In times of forced two-factor authentication mechanisms for corporate VPN networks, community portals and online banking, the need for a SMS receiving device is unavoidable. Yet, there is a huge discomfort by entering your private mobile phone number in every form that asks for it. Pages get hacked, companies get sold,... It is a matter of time that your number will be used for spam or even criminal purposes. Maybe a prepaid SIM, a small WIFI device with SIM card holder and a neat browser based interface might be the perfect solution.


Pro:
- Low cost - A prepaid SIM card is cheap and normally only has to be charged once a year for not getting canceled.
- No need for a separate mobile phone that needs to be battery powered.
- No one can call you (at unwanted times), you can only send and receive messages.
- You can receive messages in your PC's web browser.
Contra:
- You need some experience with coding.
- You might need to setup a small local webserver.
What you need to buy:
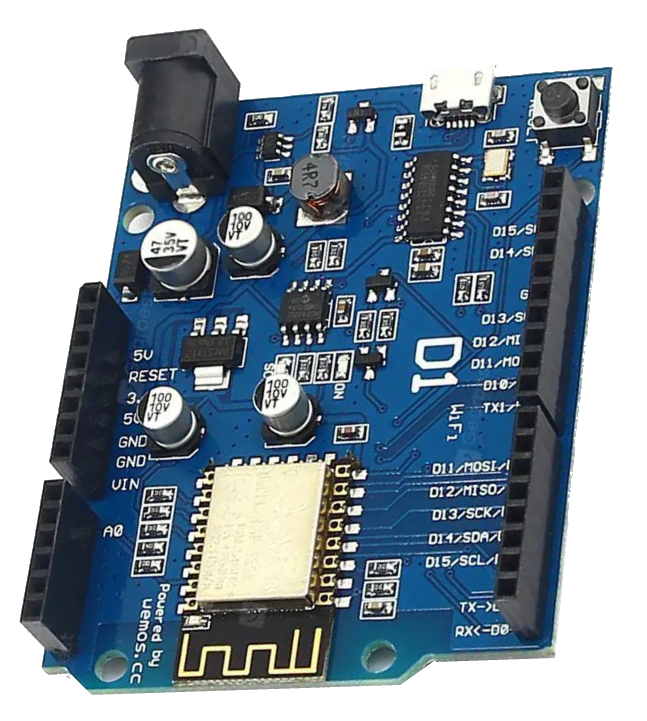
- Wemos D1 R1 or similar
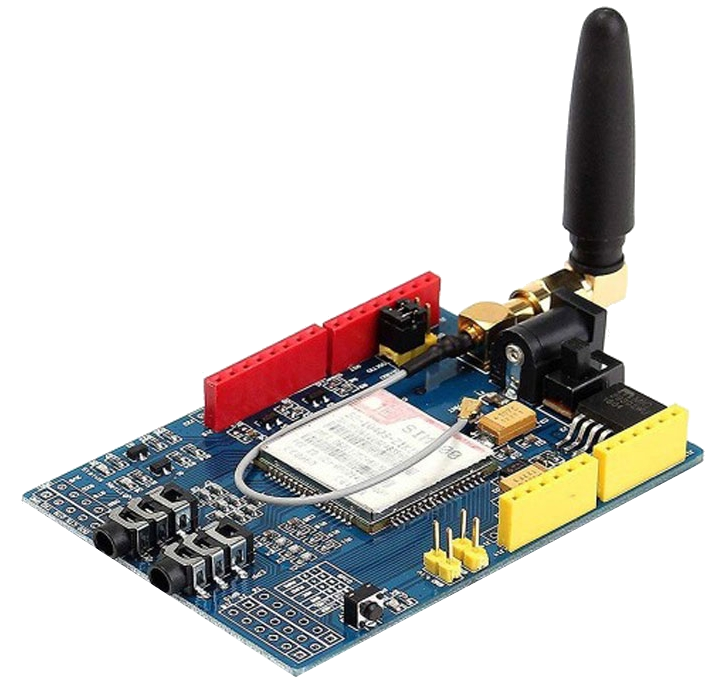
- SIM900 shield for Arduino
- Level shifter (3,3V <-> 5V)

Summary:
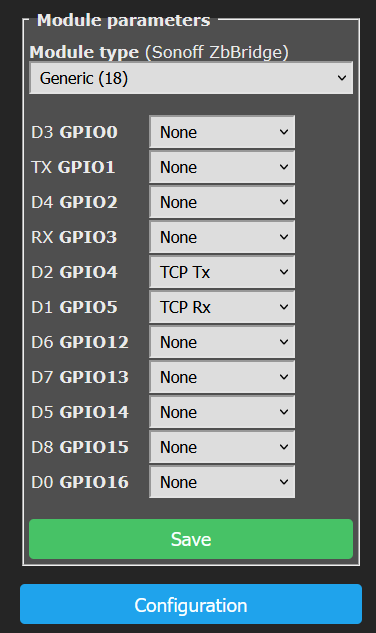
- Flash the Wemos D1 R1 with Tasmota (Zigbee bridge release!) and set two digital GPIO pins to TCP RX and TCP TX (one pin for receiving and one pin for transmitting commands).
- Connect the defined GPIO pins of the Wemos D1 R1 to the level shifter's "Low Voltage" pins "LV1" and "LV2".
- Connect 3,3V and GND of the Wemos D1 R1 to the level shifter's "Low voltage" pins "LV" and "GND".
- Connect 5V and GND of the SIM900 shield to the level shifter's "High voltage" pins "HV" and "GND".
- Connect the SIM900 shield's RX and TX to the level shifter's "High Voltage" pins "HV1" and "HV2".
- Power up the SIM900 shield with at least 5V and 2A. A 12V power supply can also be used.
- Power up the Wemos D1 R1 with a USB plug or connect the SIM900 4,1V pin to the 5V pin.
Tasmota configuration:
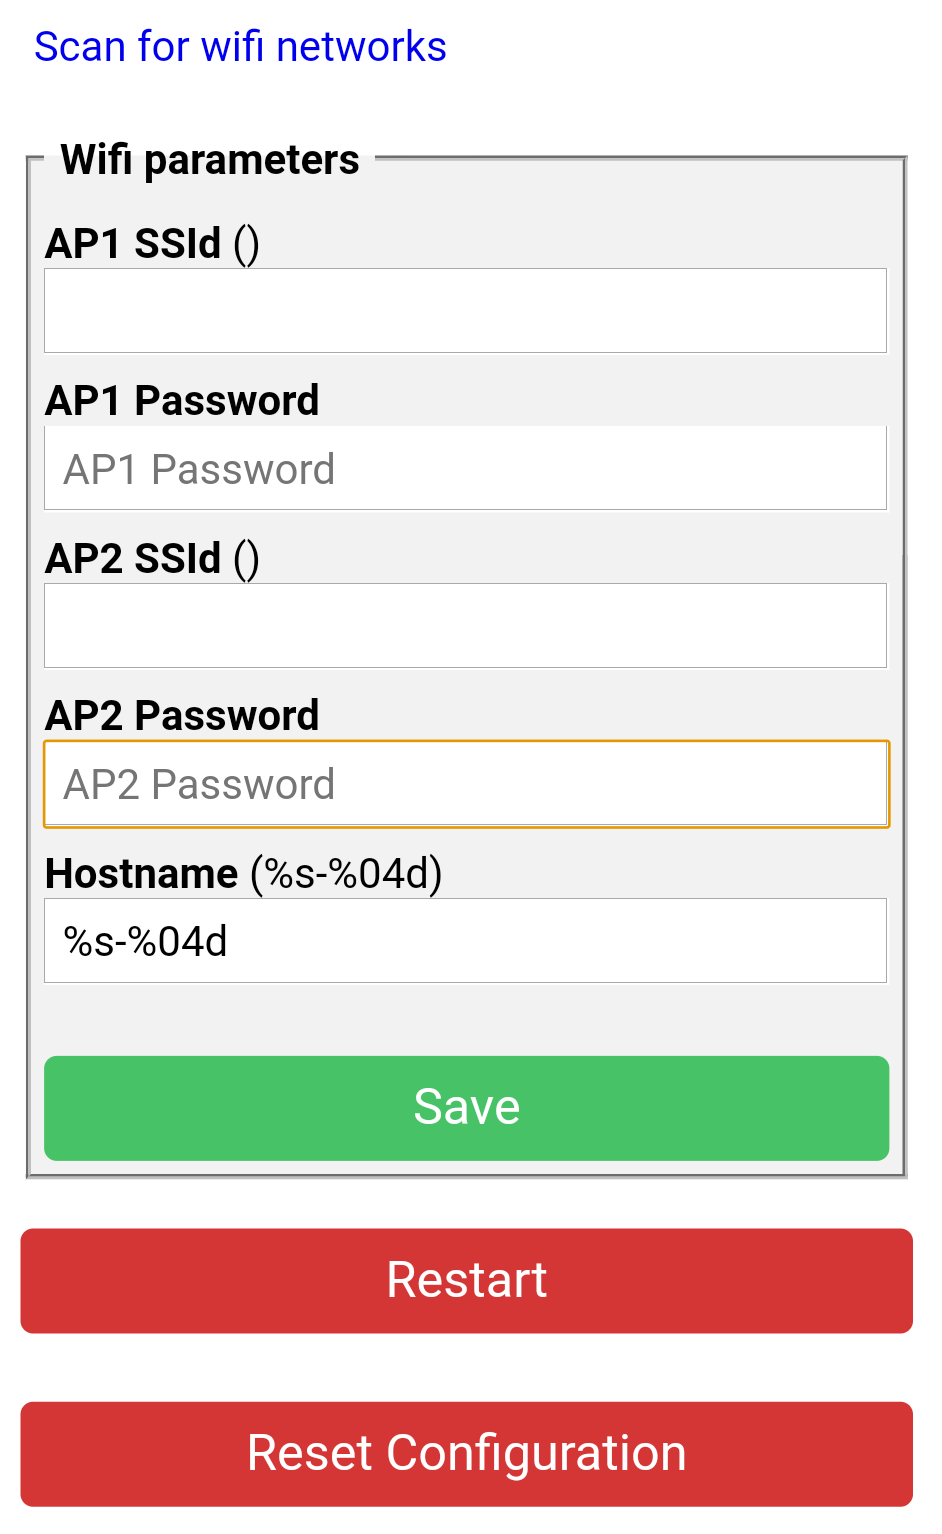
- The Wemos D1 R1 will create a new unsecured WIFI access point which you can connect to with any mobile device like your smart phone, tablet or notebook.
- Enter your personal WIFI's credentials and submit the form.
- Find out your Wemos D1 R1's IP address (for example look up in your router's web interface) and access its Tasmota configuration interface by opening the IP address in your browser.
- Configure the template's pins to match the RX and TX pins you connected in the previous steps.
- Start the TCP server on the Wemos D1 R1 by entering the following commands in the Tasmota console:
TCPBaudRate 9600TCPStart 12345Rule1 ON System#Boot do TCPStart 12345 endonRule1 1
- Now you can connect to the Wemos D1 R1 with a TCP console from your PC to the given IP address and configured port (in our example TCP port 12345) and enter AT modem commands. The SIM900 shield will "answer" these commands and output the results to your console.
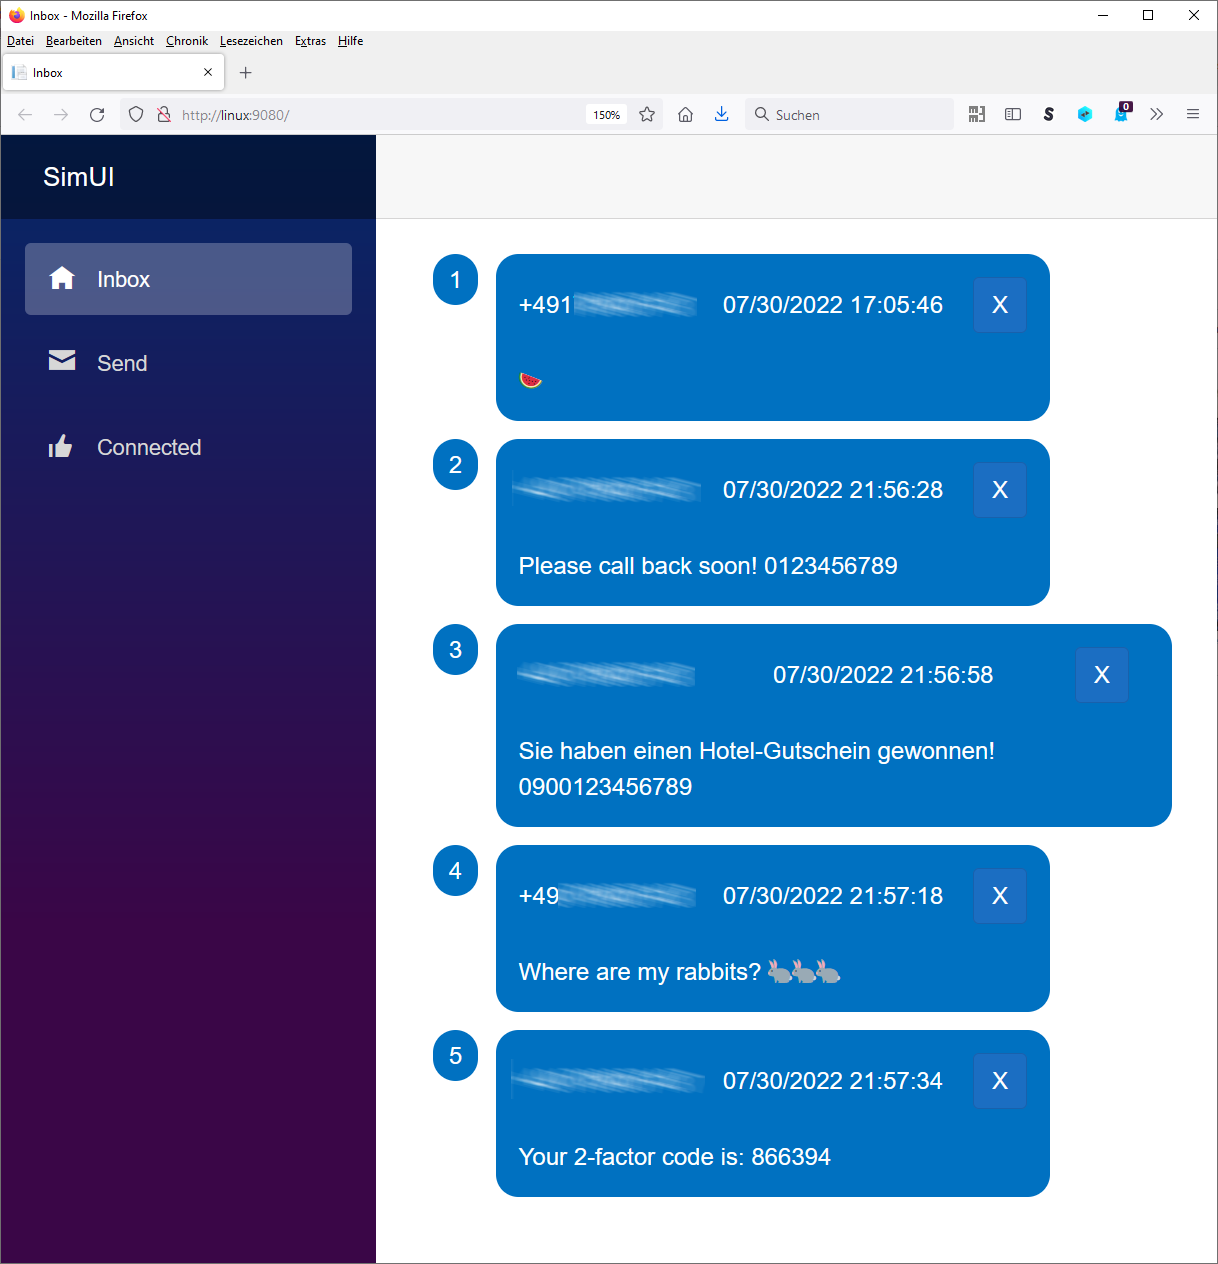
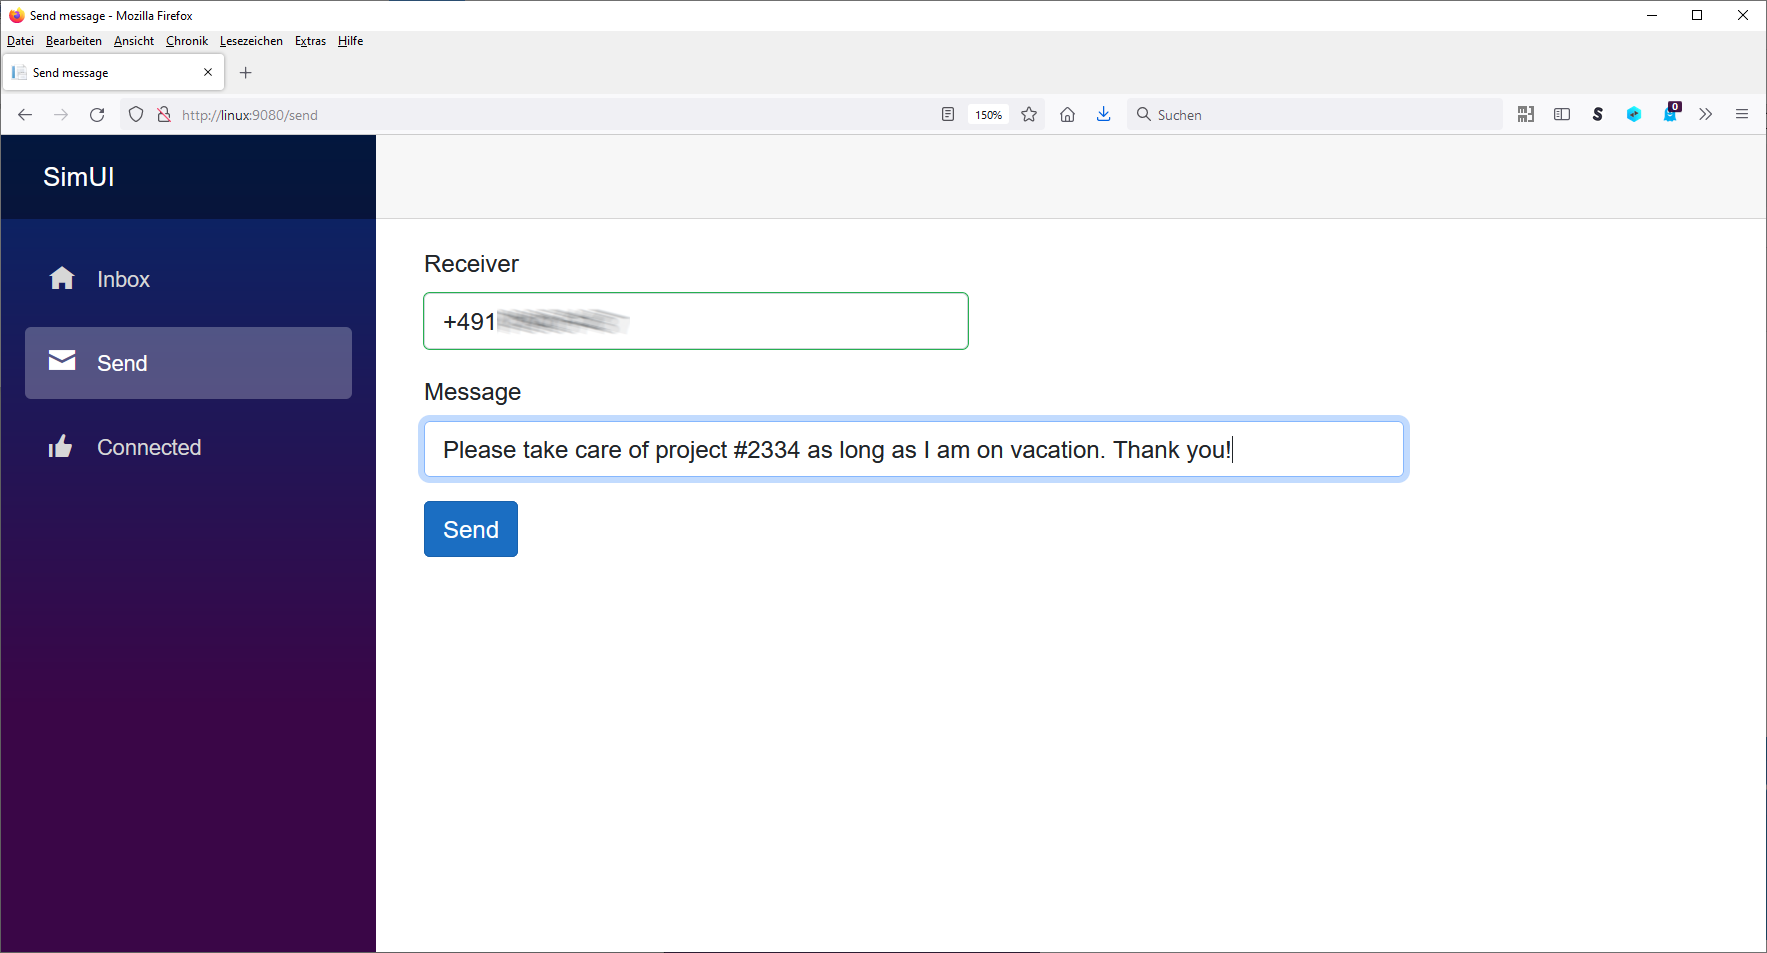
The web interface for receiving and sending SMS:
- This can be done in any framework and language that supports simple TCP connections.
- I created a user interface in .NET 6.0 Blazor that sends out simple AT commands and interprets the resulting modem messages.
AT modem code examples:
- Initialize modem and useful AT commands
AT- helloAT+CSQ- signal quality test, value range is 0-31 , 31 is the bestAT+CCID- read SIM information to confirm whether the SIM is pluggedAT+CREG?- check whether it has registered in the networkAT+CNMI=2,1,0,0,0- prints SMSon incomeAT+CTZU=1- update time zone automaticallyAT+CPMS?- lists supported message storage memoryAT+CPMS=?- shows currently used message storageAT+CSCS=?- shows currently used text encodingAT+CSCS?- lists supported text encodingsAT+CSCS="UCS2"- sets text encoding to UTF16 big endian for being able to send emojis
- Send message
AT+CMGF=1- configuring TEXT modeAT+CMGS=<RECEIVER>- define UCS2 encoded (!) target phone number in international format "+123456789" (with country code and PLUS symbol)<MESSAGE>- send UCS2 encoded (!) message string<SUB>- send character byte "26" (SUB) for submitting the message (you can create that symbol by holding ALT key and pressing 0, 2 and 6 after each other on your keyboard's NUM block)
- Receive messages
- incoming messages will automatically be shown by
+CMTI: "SM",<ID>in the console, where<ID>is the message's identifier in the SIM card's message storage memory. AT+CMGF=1- optional, configure TEXT mode (again, might have been changed in between)AT+CMGR=<ID>- prints single message in the console with matching<ID>numberAT+CMGL="ALL"- prints all messages in the SIM card's storage memory
- incoming messages will automatically be shown by
There are many more commands that you might find useful. You could even plug the 3,5mm jacks of the SIM900 shield to your computer and build some kind of answering machine if you like.
So far, the SMS "machine" is sufficient for my needs for privacy and comfort, because I can decide when and where I would like to read the incoming messages. In addition, I do not need to carry around and charge the battery of an additional phone for work purposes or online banking.
Feel free to ask me if you would like to build something similar and got stuck at some point.